killakanz's Tank Setup for Total Beginners Tutorial
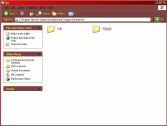
Once you've done that you've finished in gmax. So save and close. Now there are 2 ways of getting your exported models into the game. Because I've copied the crusader my model will simply replace the crusader, no INI editing needed. you can just make an Art folder in your Generals install folder, then 2 folders in that named Textures and W3D. Put your W3D files in the W3D folder and your textures in the Textures folder (duh). Run the game and it'll work like that, but it leaves you with lots of floating files lying around in your generals folder. (PS, please excuse my horrifyingly ugly windows colour scheme. I thought it was cool when I first put it on but have grown to disslike it too but can't be bothered to change it)

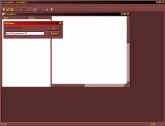
So what I do is put all these files into one .big file. This is good because it leaves you with just 1 file for each unit you make. This means you need a program that can read/write .big files. I use FinalBig but you can use others like XCC Mixer. Add your W3D Files under Art\W3D, as shown. Put your textures in Art\Textures. Now save it with any name (and the .big extention) into your generals install folder.

And that's it! If your tank appears too big or too small in game you can go back to it in gmax and scale it up or down, so it's usually good to use the folder method while you're testing it, then put it into a .big when you're happy with it.
Remember that different units/structures use different bones. Take a look at some default Generals units to see what bones they use.
Also if you are still having any problems, feel free to leave a message on my forum. I do check it regularly and will help if I can, that is if someone else doesn't help you out before I get there! Have fun making stuff. Let me know how you get on by posting pictures of your tank on the forum, and any feedback is always welcome!
