1. Getting Started
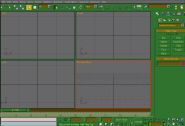
Once gmax and it's westwood "RenX" plugin is installed properly you can open RenX via the shortcut on your desktop. You should see a screen a bit like this.

Daunting eh? I'll tell what's daunting: The thought of trying to explain it all now...
You have here the 4 main views, the main toolbar at the top below the window options, the "Command Panel" to the right and finally the "Track Panel" at the bottom.
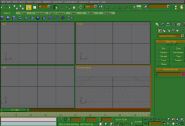
But there's 1 important toolbar which comes in very very handy, but it doesn't showup by default the first time you open RenX. Click on Customise, then go Show UI>Show Tab Panel.

There it is. This toolbar comes in very handy and now you've activated it it'll appear automatically the next time you open RenX!
Ok. Lets get started. There are lots of buttons in front of you here. When you hold your cursor over the button a tooltip appears. I will refer to the buttons by their tooltip names and may give brief directions to where they are or what they look like. In the 4 views you have the world. Looks amazing doesn't it? All 4 views also showing the corner the world axis, X, Y and Z. The X axis points side to side, Y points back and forward and Z points up and down. In all views they all point the same way in the 3D world and they're there to keep you orientated.
Remember to save often!!
